3D Interactive Model
January to March 2021
During the past 4 weeks, my task was to take an already existing 3D model and turn it into an interactive 3D experience. I developed this experience by allowing users to interact with buttons that allow specific changes to both the model and the background in which the model is placed in. Throughout this project, I was introduced to new elements of JS that allowed me to manipulate and show the 3D model while also utilizing past knowledge of JS.
The first thing that I did was try to find a model that I really liked and could incorporate elements specific to that model only that I knew of. After finding a model that I really enjoyed and could look at for long periods of time, I went into the development stages and came up with a series of ideas that I could use to manipulate the model from the user’s standpoint.
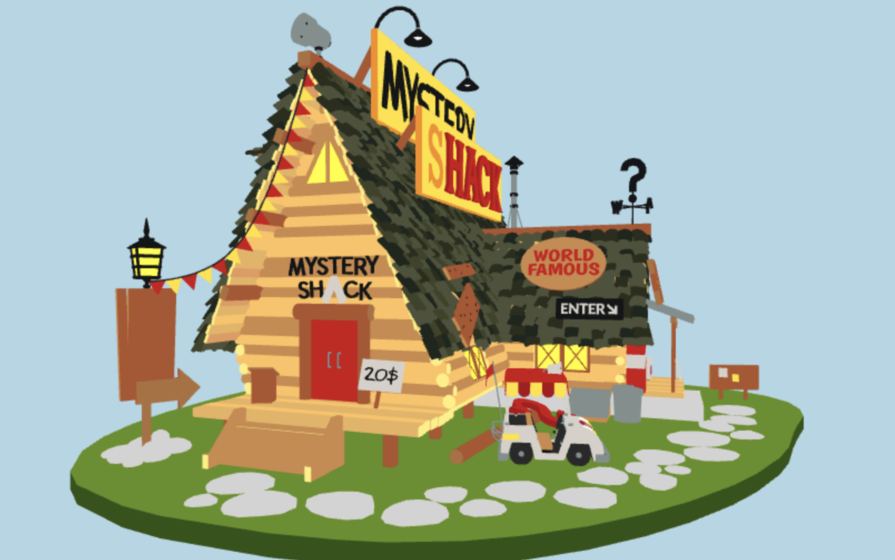
For this project, I was given the task to create an interactive 3D Model using HTML, CSS, and JS. There was no restriction for what was to be developed, so I decided to dig deep into one of my interests and decided to choose the Mystery Shack from the show Gravity Falls due to its playful and eerie side.
The problem that this Web Vr experience solves is the ability for a user to interact and find ways to manipulate the model on their end. Instead of moving the model and zooming in and out, the user is able to change the colors, brightness, and sounds associated with the model itself, making it an interactive experience rather than just staring at a model.
This project will be successful if I am able to have the users interact with the model further than just a basic zoom and rotation. I want to allow the users to really feel like they can work and manipulate the model themselves while also immersing themselves in the experience. Not only that, but the goal is to have a fully functioning Web VR experience that anyone of all ages can enjoy. I want users to not only work with this model but also learn more about the model and its setting in relation to the show that it originates from.
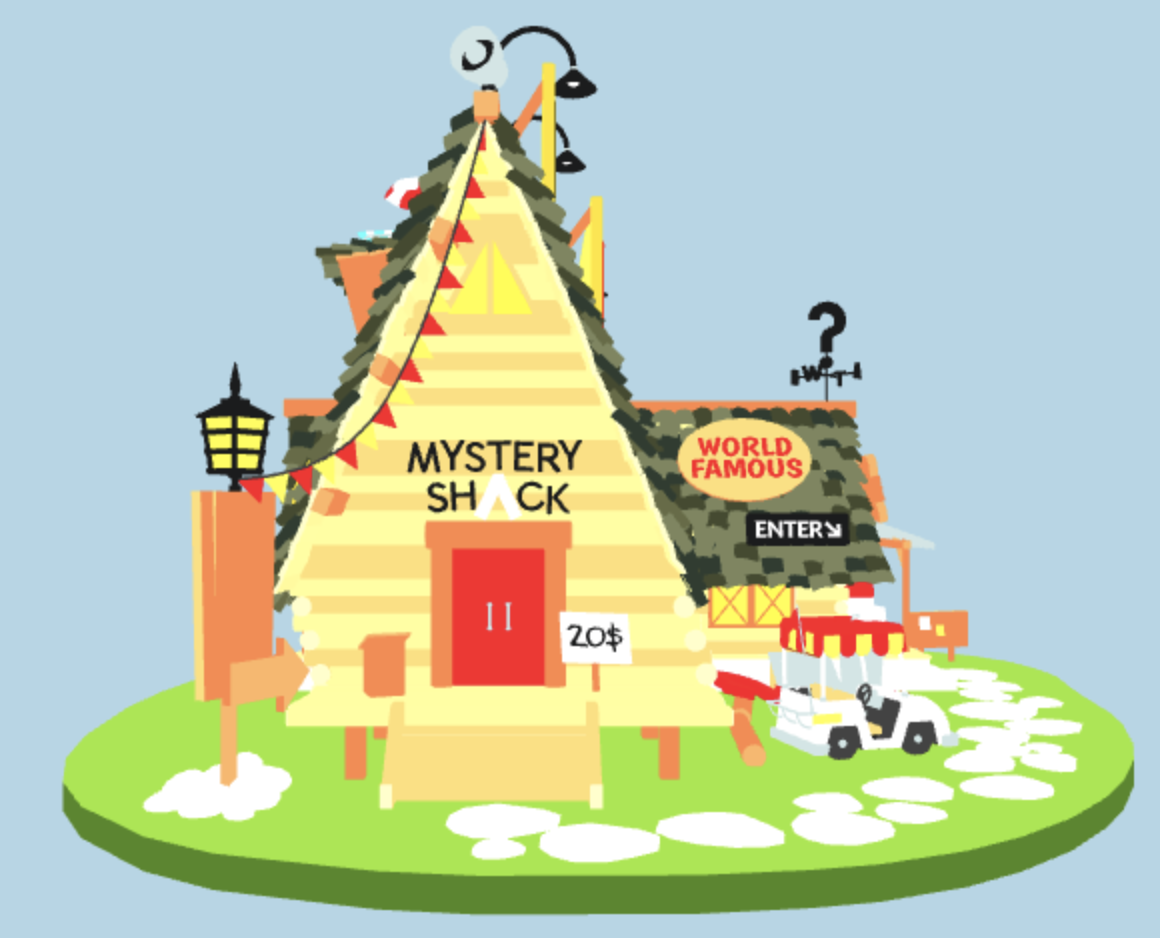
The first thing that I did during this project was trying to find a model that would fit what I wanted to do with the immersive experience. The number one thing that I knew what I wanted the user to manipulate was the brightness level of the model. It was something other than zooming in order to change the rotation that the user would be able to enjoy. The major problem I had was trying to find a model that was able to change its brightness was adjusting the Ambient Light level. I went through a few possible models that I wanted to utilize, but all of them had problems with either changing the camera Z position, or not being able to change the brightness no matter what level the Ambient light was at.
An important issue going into this project was trying to position the model where I wanted it to be on the screen. I understood that the camera.position.z = 30 allowed the zooming in and out of the model since it was positioning along the model’s x axis. I then made the connection that if the camera position was moving on its Z axis, than changing the “z” to “y” or “x” would move the camera either left or right. However, the way that it moved wasn’t how I thought it would. The position was moving in directions that were closed up to the model or diagonally.
One of the main features that I wanted to implement was to change the light shining onto the model. I knew how to change the set light of the model by setting the Ambient Light to a specific brightness. However, when having a button clicked onto to change the light, I found it a little tricky to figure out since instead of manually switching the brightness of the Ambient Light, I now needed the light to change based on the button click.
When starting off with developing the buttons to manipulate the model, I started off using words so it would flow easier and allow fast adaptations to the buttons. I then realized the users most likely would not want to be reading the buttons since it is proven that humans are too lazy to fully read anything shown to them. So, I made a decision of changing each of the buttons into icons that were easy to understand and let the user know what they are manipulating. I adjusted each of the icon widths so there would be enough padding inside the button as well as having each of the buttons maintain the same size with one another.
When trying to find the correct model for what I wanted to achieve in terms of brightness, I went through many trials and errors since I couldn’t determine whether or not I could adjust it by looking at the GLTF file. To find the perfect model, I brought each model individually into my code to make sure that the brightness could change. I hard-coded the Ambient Light without a button to ensure that the brightness and darkness could be adjusted. It took around 5 models to get through until I found the one that was able to accommodate the 3D Model Experience needs.
When trying to switch the camera position’s “y” and “x” axis, I realized that I was changing the position of the incorrect object. Through some debugging, I found out that I was supposed to be changing the position of the “modelObj.” All along, I was changing how the camera was positioned in relation to the 3D Model when I should have been changing the position of the actual model in respect to the camera’s position.

At first, when figuring out how to allow the brightness to change based on the button click, I had to locate where the Ambient Light was originally being changed. From there, I changed it from a const to variable to allow the variable to be manipulated. After implementing that change, I then created a variable at the bottom of the document to grab the HTML button element and apply an on-click function onto the specific buttons I wanted to manipulate the light. From there I applied a console log to both to ensure that the buttons were functioning properly. I then copied the Ambient light variable and its function, while setting the brightness number to both 5 and -5 allowing the light to change by those specific increments.
This Interactive Web VR Experience was successfully developed using JS Frameworks, HTML, and CSS. The metrics that measure these successful results are being able to see the 3D Model on the web, being able to manipulate the model in at least 2 different ways, having the sound properly play, and pause when the user wants to, and allowing the user to have full control over the model.
If I had more time to work on this, I would have loved to add buttons that you clicked on to get you to specific sections of the model. However, because of the short time frame for the final, I wasn’t able to successfully implement that. I foresee this model also possibly being able to have hover points on it that allow the user to click onto the model, providing further information on the model, or allow you to get closer and better details of specific sites within the model.